Extracting thirty bees
There are several free extraction programs available, such as winzip, winrar and gzip. FTP means "file transfer protocol". If you have never used compression / decompression software before, please see the documentation on the website where you downloaded the extraction software. Then, it's best if you use the wizard, quickstart or whatever your chosen program has, to do the following: extract the thirty bees software you downloaded earlier. This should result in the creation of a folder named "thirty bees". It contains a vast amount of subfolders and files (or subdirectories and files), depending upon whether you use a PC or a Mac. Take note of where this folder is located so that you can access it immediately. If you can't find the compressed (zip) file, check your desktop and your downloads folder. If you still can't find it, do a search on your computer for "thirty". If all else fails, go back and download it again and select where to save it before you press "enter" or "return" to save it.
FTP Files to Server

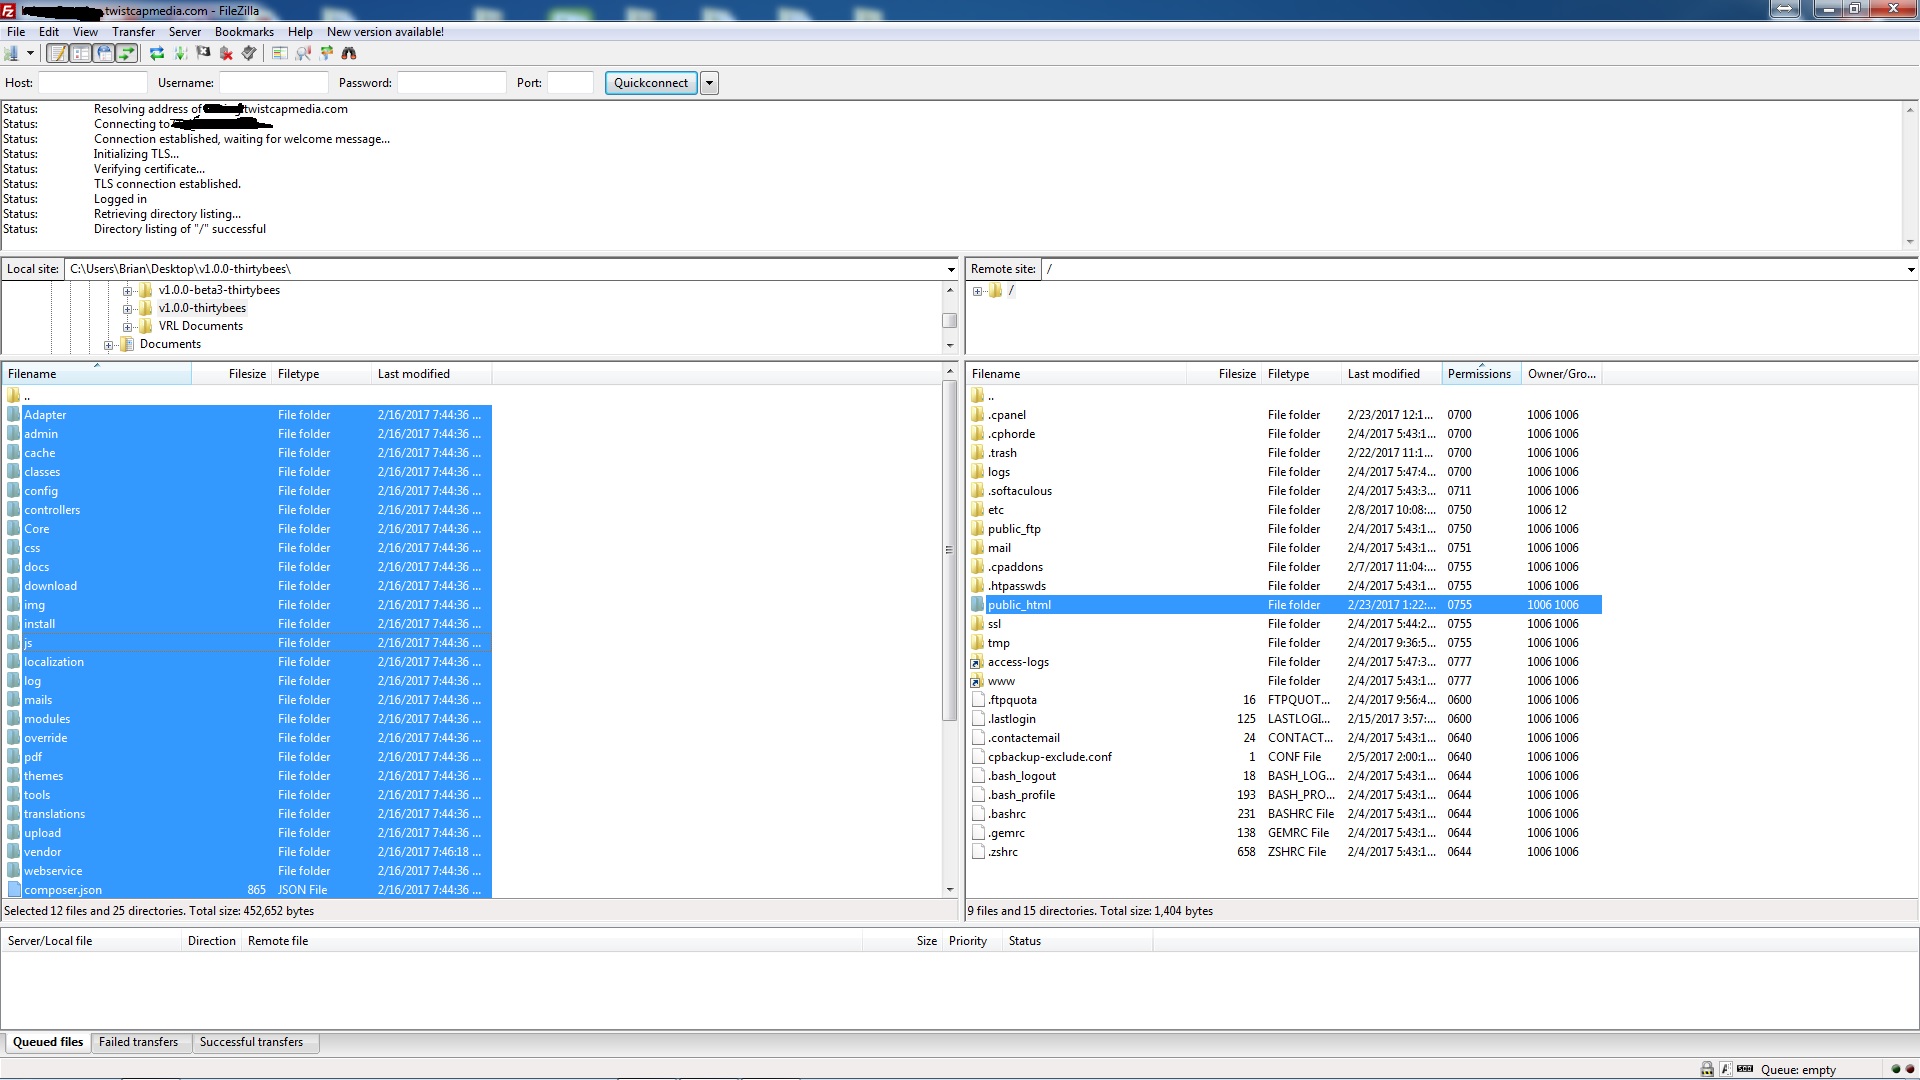
Your hosting provider should have given you a log in and a password to access your website server. If you don't know where those credentials are, search your email for your web host's emails. Most likely, you will have received email with the log in and password and advice / directions to "change your password". Now, run your FTP client, discussed earlier, and fill in your log in and password credentials. Save these settings and connect to your server. Please save your log in and password somewhere readily accessible, since you will need it for a variety of processes related to your website. You should see a list of folders once you are connected. Usually, you will find one of two folders listed: /public_html/ or /www/httpdocs. In the FTP client, navigate to where you extracted the thirty bees folder and drag all the folders and files into the /public_html/ or /www/httpdocs/ folder.
ONLY MOVE THE FILES AND FOLDERS CONTAINED WITHIN THE thirty bees FOLDER - DO NOT JUST COPY THE ACTUAL thirty bees FOLDER!
NOTE: If you want your shop to be located in yourdomain.com/shop/ for instance, then be sure to create a folder named "shop" in your /public_html/ or /www/httpdocs subdirectory / subfolder and move the installation files into it. For instance, if you want your shop located at mydomain.com/myshop, you would move all the installation files and folders to /public_html/myshop/.
Creating a Database

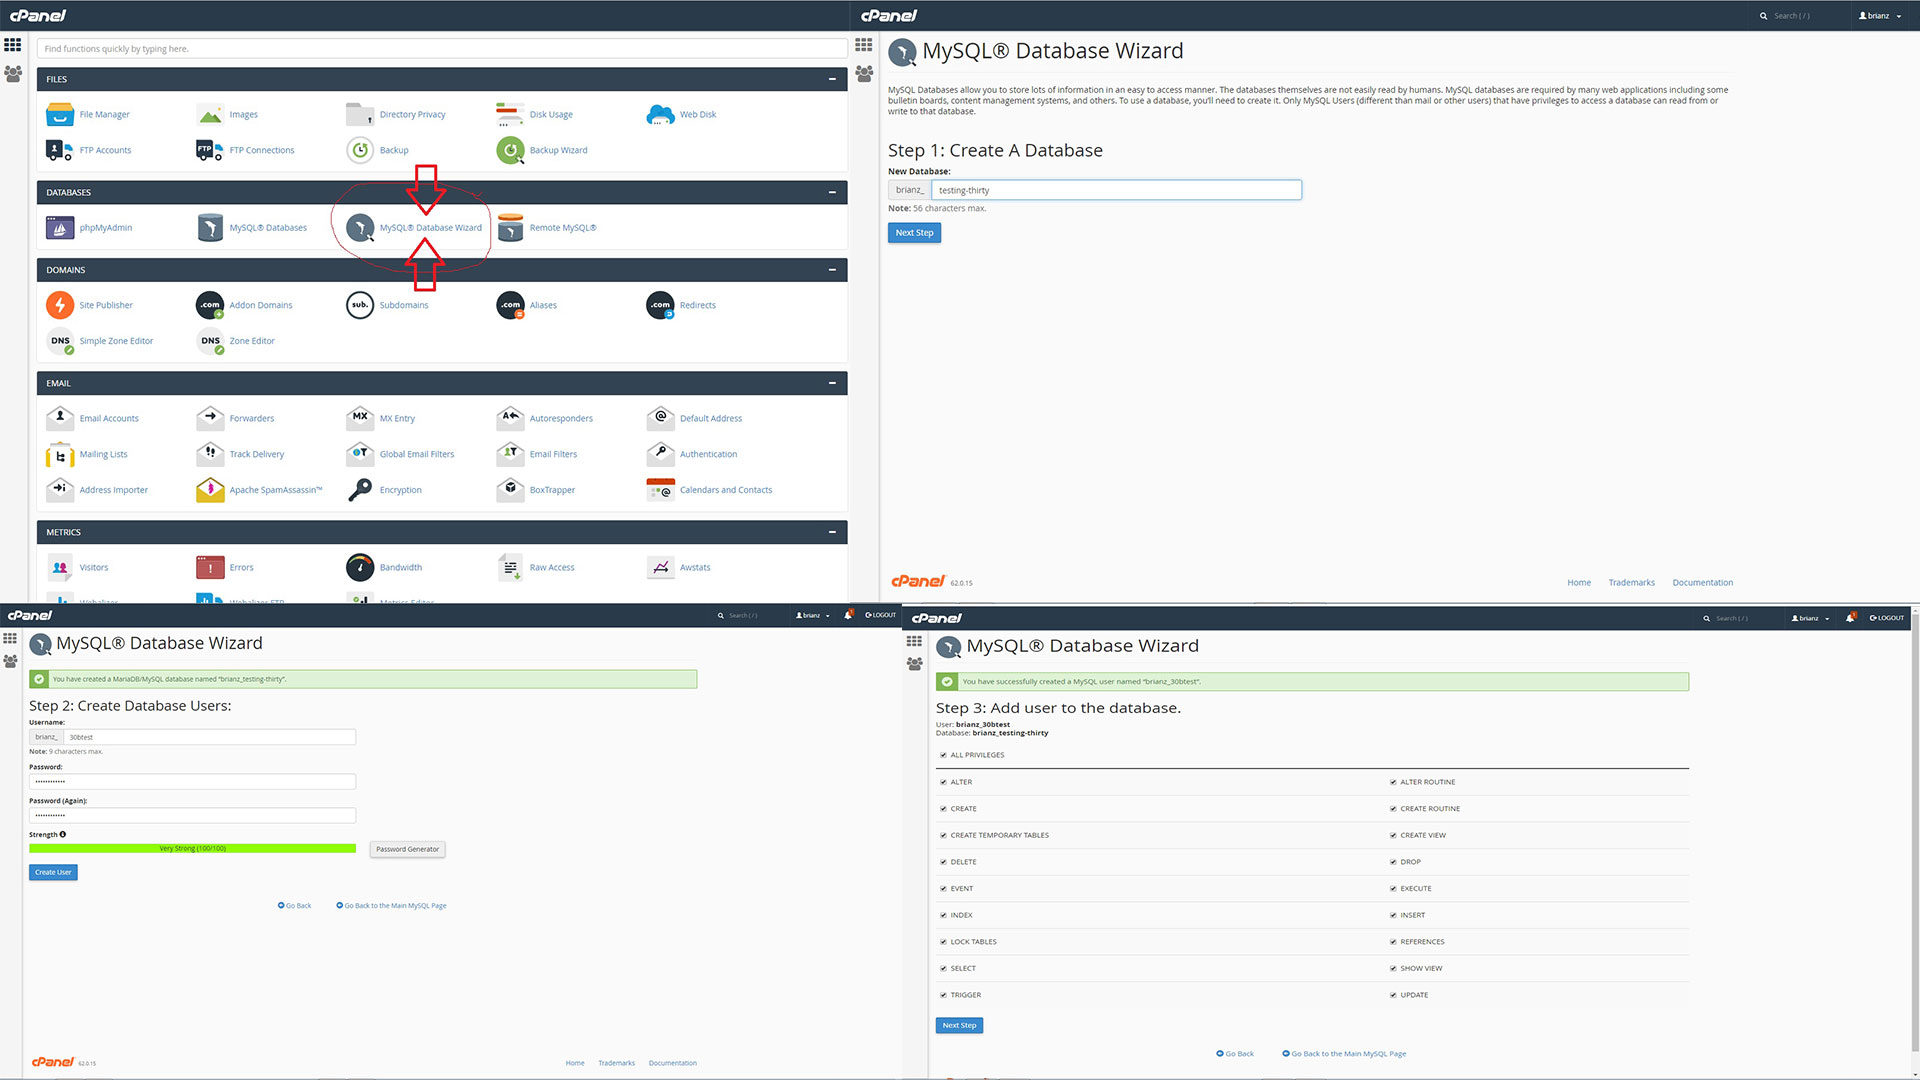
While the FTP software is transferring files, you can begin the next step. The Database is where all the information for your store is saved. Most hosting platforms use cPanel and phpmyadmin with quick database creation tools. See illustration. You will need to create a new database for thirty bees and a user account with all privileges. You are the user. Please write down the database name, username and password, since this information is required for other steps.
Install thirty bees

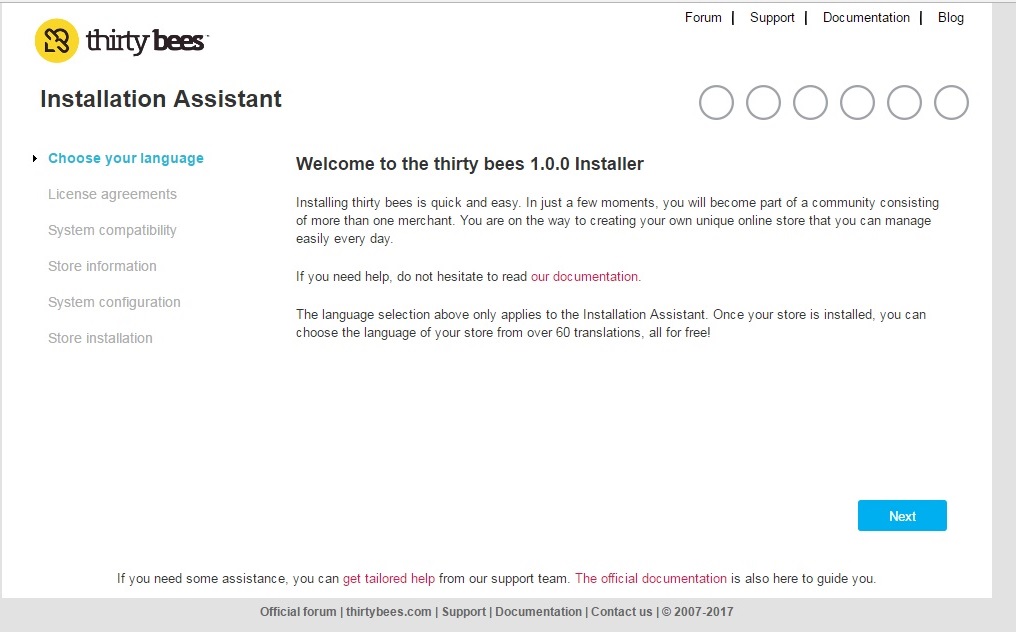
Once all of your files are transferred and your database is created, it's time to install thirty bees! Open any web browser and navigate to your domain. You should be greeted with a thirty bees installer screen. In this screen you will do the following:
- Language Selection (Coming Soon) - Select the language of the installer.
- License Agreement - Check to agree to the licensing, terms and conditions of using thirty bees software.
- System Compatibility - Checks your server environment, settings and files to assure that all the requirements are met and that everything is configured to work with thirty bees.
- Store Information - Set up your store name, country, time zone and create your first account to access the administration area.
- System Configuration - Enter the database information you created and saved earlier. (Note: Your database server address [9 times out of 10] is simply "localhost" without quotes.) Be sure to test your database connection after entering all your information, to assure that it successfully connects.
- Store Installation - The system will run through the install process. Once completed, you will arrive at a completed page with two links. Copy and paste these two links NOW! One link takes you to the "front end" of your store, which is what your customers see. The other link is your "Back Office Administration Area" (sometimes abbreviated as "BO"), which can only be accessed by you and anyone else you may share the log in credentials with. Do not give out these credentials to anyone, unless absolutely necessary, such as your website developer, etc. Do not walk away from your computer without signing out, unless you're the only one in your office. You can't say, "the cat jumped on my keyboard" as an excuse if something gets messed up! Again: BE SURE TO SAVE YOUR BACK OFFICE URL!!!
- Delete Install - For security purposes, you will not be able to access your site until you delete the /install/ folder you uploaded earlier.
Congratulations
You've done it! If you have reached this step that means you have successfully installed thirty bees. Please read through the Merchants Guide next to familiarize yourself with the Back Office Administration Area and all it has to offer!
