Preferences
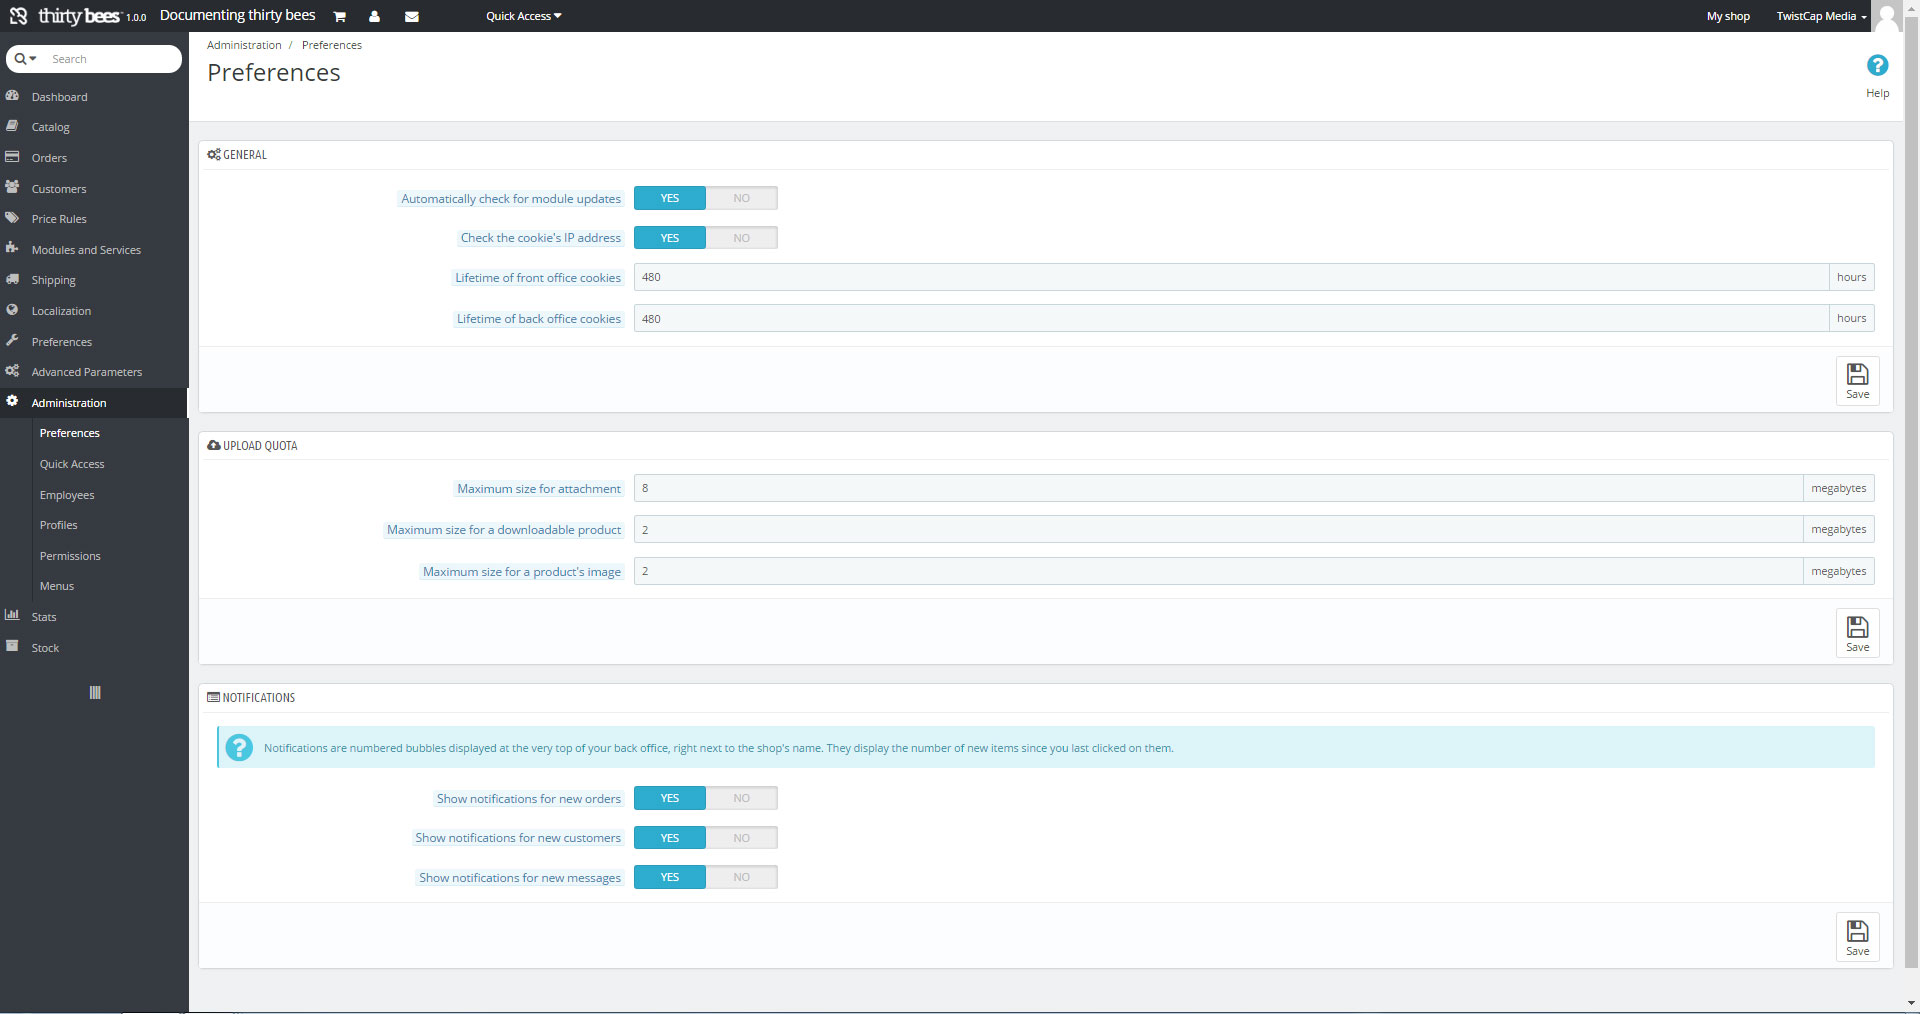
On this screen you can setup your general administrative store preferences.

General:
- Automatically Check for Module Updates
- Would you like your modules checked automatically and be made aware if there are any updates.
- Check The Cookie's IP Address
- Ensure the cookies ip address match to protect against hijacked cookies.
- Lifetime of front office cookies
- Length of time a cookie is valid and the customer isn't required to re-login.
- Lifetime of back office cookies
- Length of time a cookie is valid and an employee isn't required to re-login.
Upload Quota:
- Note: The following values must be less than or equal to what your server settings allow.
- Maximum size for attachment
- Set the maximum file size you allow in attachments.
- Maximum size for a downloadable product
- Set the maximum file size you allow for downloadable products.
- Maximum size for a product's image
- Set the maximum file size you allow for product images.
Notifications:
- Show notifications for new orders
- Would you like to be notified in the top bar of the Back Office about new orders?
- Show notifications for new customers
- Would you like to be notified in the top bar of the Back Office about new customers?
- Show notifications for new messages
- Would you like to be notified in the top bar of the Back Office about new messages?
Quick Access
On this screen you can add, remove, or readjust the Quick Access menu, located in the top bar of the Back Office. To create a new menu item, click Add New Quick Access button in the top right corner.
Add New Quick Access
- Name - The name of the link as you would like it to appear in the Quick Access Menu.
- URL - What page would you like to go to when you click on the link.
- Open In New Window - Would you like this link to open in a new window when clicked?
Employees
On this screen you can view, add, or remove your list of employees. To add a new employee, click the Add New Employee button in the top right corner.
Add New Employee:
- First Name - Enter the first name of your employee. (Will be visible when replying to customers and in Back Office.)
- Last Name - Enter the last name of your employee. (Will be visible when replying to customers and in Back Office.)
- E-Mail Address - Enter the email address of your employee. (Will be used to log into the Back Office)
- Password - Enter the password for your employee.
- Subscribe to thirty bees Newsletter - Would you like your employee subscribed to the thirty bees newsletter?
- ** Default Page** - Set the default page your employee will land on when logging in.
- Language - Set the default language for your employee.
- Theme - Set the default theme for your employee.
- Admin Menu Orientation - Set the default menu orientation for your employee in the Back Office. Left Vertically or Top Horizontally.
- Active - Is this account active, and the employee is able to login?
- Permission Profile - Set the permission level of your employee.
General Employee Options:
- Password Regeneration - The minimum time which employees need to wait before being allowed to reset the password from the last time it was reset.
- Memorize the Language Used in Admin Panel Forms - Allow employees to select specific languages for form.
Profiles
On this screen you can create the names of the different permission level grouups you plan to have. To create a new name, click the Add New Profile button in the top right corner.
Add New Profile:
- Name - The name of the profile group.
Permissions
On this screen you can assign your profiles different permission levels for the different roles your employees will play in your organization.
Simply create a profile name for it to show up on the left side menu. Once there, you can click on the profile names and be presented with a screen that has every section of the store as well as specific modules and protocols.
You can assign your employees the following access:
- View
- Add
- Edit
- Delete
- Do All The Above
In this way, you can assign your shipping department only those things they need to complete their task and do the same for other parts of your enterprise.
Menus
On this screen you can add, edit, remove, or readjust the Back Office menu. The first level menu is visible as soon as you enter the page. Click into any of them to see what links are under them in the second level menu. To create a new menu, click the Add New Menu button in the top right corner.
Add New Menu:
- Name - Name of the menu as you want it to appear
- Class -
- Module -
- Status -
- Parent -
